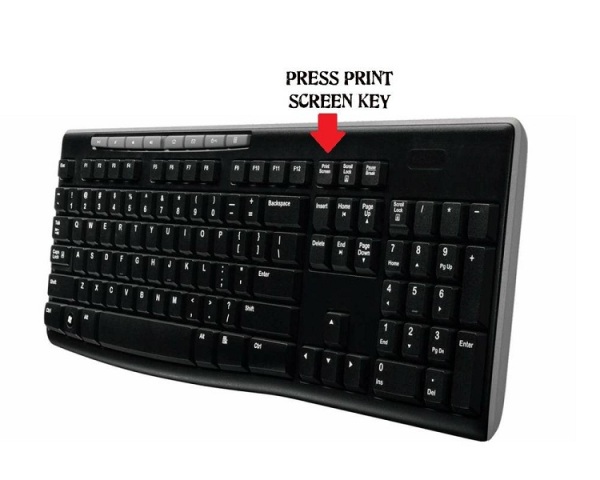
A screenshot is an image captured by the computer for recording the items displayed on the monitor. Read the article to find some simple tips on how to take a screen shot.
How To Take A Screenshot
A screenshot, screen capture, or screen dump is used to refer to an image captured by the computer, which records the visible items displayed on the monitor or another visual output device. Usually, the host operating system or the software running on computer captures a digital image. However, a camera or a device intercepting the video output of the computer can also capture the image. Screen shots can be used when a user has to demonstrate a program or a particular problem encountered by him/her. Generally, screenshots are taken when one wants to show the computer output to others or simply want to create archives. With so many interesting uses, it is helpful to learn how to take a screenshot. Read on to find some simple steps to help you capture a screenshot.

Tips To Capture A Screen Shot
Screenshot in Microsoft Windows
- The first step is to press the "Prnt Scrn" key.
- Then, open Microsoft Paint. To open Microsoft paint, click on "Start", and then access "All Programs". Click on "Accessories" in All Programs and you will find the "Paint" option. Click inside the white part of the screen.
- Now, go to the edit menu and click paste. Alternately, you can also press and hold “ctrl” key and tap V. Then, you can crop as you like.
- Once you have cropped the image, click on “File” and then click on “Save As Type” to PNG or JPG. Type a filename for the cropped image. Choose a location to save, such as My Documents or Desktop. Click Save.
- You have successfully taken a screenshot. In case you wish to send the picture to someone, attach the ,png or .jpg file that you recently saved with an e-mail and send the image along. You can also upload it on the internet on different sites.
Screenshot in Windows Vista
- There is a tool called Snipping Tool in Windows Vista (except in home basic), which is to be used to capture a screenshot.
- Click on the Start menu to open access the Snipping Tool. Type snip and then press enter. The latest Windows Vista version updates the search results as you type each letter.
- Now, click on Snipping Tool.
- This will open up the Snipping tool and a white mask is applied on the screen. In the drop down menu for the ‘New’ button, you have the options; free-form snip, rectangular snip, window snip, or full-screen snip. You can choose whichever option you prefer.
- In the free-form snip mode, you will have to draw around the area that you want to be captured. In the rectangular snip mode, you will have to drag a rectangle. Select the window you want to capture for the window snip mode. In the full-screen mode, selecting it from the drop down menu is enough to make the capture.
- To save the image, you have to follow the same steps as mentioned above for saving a screenshot in Microsoft Windows.
See also
More from iloveindia.com
- Home Remedies | Ayurveda | Vastu | Yoga | Feng Shui | Tattoos | Fitness | Garden | Nutrition | Parenting | Bikes | Cars | Baby Care | Indian Weddings | Festivals | Party ideas | Horoscope 2015 | Pets | Finance | Figures of Speech | Hotels in India : Delhi | Hyderabad | Chennai | Mumbai | Kolkata | Bangalore | Ahmedabad | Jaipur
- Contact Us Careers Disclaimer Privacy Policy Advertise With Us Lifestyle Sitemap Copyright iloveindia.com. All Rights Reserved.


