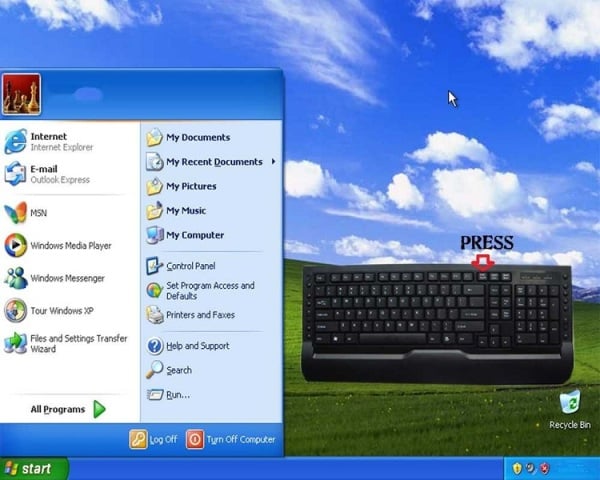
Taking a screenshot is the easiest thing to do. Read your way through this article for a step-by-step guide on how to take a screenshot in Windows XP.
How To Take A Screenshot In Windows XP
A screenshot is as good as taking a ‘photo’ of your computer screen and transferring it to another document on your computer, only you may not need to use a camera. The process of taking a screenshot of your computer screen or a web page is made possible with the assistance of a unique button called the ‘print screen’ button and a paint document. A screenshot is also known as a screen dump or a screen capture. It is a digital image taken by a software or a host-operating device that runs on your computer. However, this does not mean that a screenshot has to be taken only with the assistance of the software or the ‘print screen’ button. A screenshot can also be taken with the help of an external device such as a camera. It is taken to show others a particular file, document, or web page. Screenshots are especially useful when errors or problems need to be pointed out. Find out how to take a screenshot in Windows XP.

Taking A Screenshot In Windows XP
The Target
Zero in on the web page or word document you want to get a screenshot of. This step may not be a part of the process of taking a screenshot, but definitely the reason behind the same.
Press The ‘Print Screen’ Button
This step is necessary to initiate the process of taking a screenshot in Windows XP. Take a good look at your computer. You’ll see a button which says ‘Prt Scr/SysRq’. It’s the third button from the last in the first row of buttons or keys on your keyboard, on most ones at least. This button is known as the ‘print screen’ button. The ‘Prt Scr’ you see on it stands for ‘print screen’ and ‘sysrq’ stands for ‘system request’. Get your cursor to your chosen web page or document and press the ‘print screen’ button.
Start Menu/Start Button
Left click on the ‘start menu’ or press the start button on your keyboard. The ‘start menu’ is the icon you see on the bottom left of your screen. There are two start buttons on your keyboard. The first start button is the second button in the last row of your keyboard. The second start button is the second button after the spacebar. Both start buttons will have the Microsoft windows icons on them.
Microsoft Paint
After you’re done clicking on the start menu or pressing the start button, choose programs > accessories > Microsoft paint. Following these sequences will lead to the opening of an untitled paint document. Get your cursor to the white part of this document.
Paste
Navigate to the ‘edit’ menu you see on the top of your paint document. Left click on it and choose ‘paste’. Voila! Your screenshot is ready! Alternatively, you can just press ‘Ctrl + V’ instead of going down the ‘edit and paste’ way. The end result is the same anyway.
Save
To save your screenshot, left click on ‘file’ and ‘save as’. A new window or box will pop up. Change your ‘save as type’ to JPG or PNG and type out the name for your screenshot. The screenshot will be saved onto your computer for further use.
See also
More from iloveindia.com
- Home Remedies | Ayurveda | Vastu | Yoga | Feng Shui | Tattoos | Fitness | Garden | Nutrition | Parenting | Bikes | Cars | Baby Care | Indian Weddings | Festivals | Party ideas | Horoscope 2015 | Pets | Finance | Figures of Speech | Hotels in India : Delhi | Hyderabad | Chennai | Mumbai | Kolkata | Bangalore | Ahmedabad | Jaipur
- Contact Us Careers Disclaimer Privacy Policy Advertise With Us Lifestyle Sitemap Copyright iloveindia.com. All Rights Reserved.


