Though passport pictures are done in minutes, professionals make their clients look too bad in them. Here’s how to avoid that issue and to make passport photos on the computer.
How To Make Passport Photos On Your Computer
Many of us hate getting passport-sized pictures clicked; much more than that, we hate seeing ourselves in them. They make us look like ghosts or zombies who have just one expression on their faces. Some of us have the complaint that they make us look too fat, too dark or just not the way we would want ourselves to be. Many of us even ask our not-so friendly photo studio owner to lighten the colour of our skin by a shade or two to make us look fairer. Others blink when we should not be blinking and smile when we have been told repeatedly not to smile. Yet a few others love to show off their pearly whites on the photographs too, knowing that smiling is not allowed when it comes to passport-sized pictures. An alarming number of us, finally, are just too lazy to go to the nearest photo studio and get a passport-sized picture done. In such a case, it is better to get it done at home using the computer. All one needs in the form of an investment is a colour photo printer and some pages of photo printing paper. Here’s how to make passport pictures with a computer.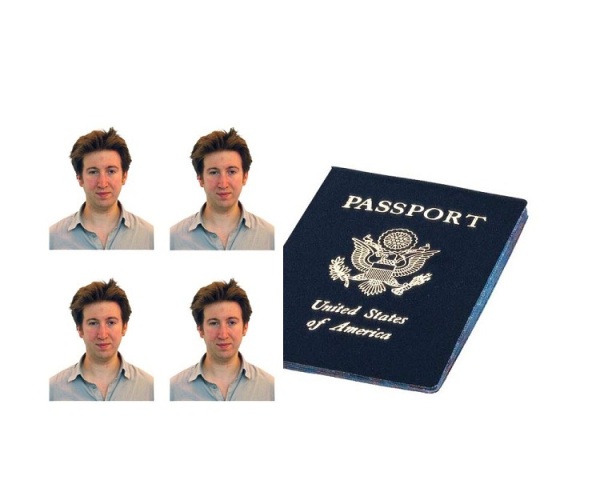
Making Passport Photographs At Home
Here’s the procedure for making passport pictures at home. First, you must gather a few things that you may need:
Things You’ll Need
- White/off white wall or white easel paper
- Digital camera
- Color printer
- Photo printing paper
- Ruler
- Paper cutter
- Duct tape
Procedure:
Step 1
Locate the largest white or off-white wall in your home and use it to serve as the background. If you do not have a white wall at home, you could buy a large easel paper and attach it to a wall that is free of any pictures or hangings. It is always better to have a white background because the available light of that room will bounce in all directions and will give a soft look to the face without so much as one disturbing shadow, for instance the dark pools that one sees under the eyes. If you do notice such shadows that look ugly and disturbing, you can use a homemade reflector which can easily be made by wrapping a piece of cardboard or thermocole with crushed aluminum foil and aim in the direction of the shadow on your subject’s face.
Step 2
You will need to position your subject approximately 1 foot away from the background or more, with his or her back to the wall, facing you head-on. He or she needs to sit with eyes open and mouth closed; remind them not to show their teeth and to keep a natural and neutral expression on their face. The reason why smiling isn’t allowed is because a smile makes the eyes grow smaller in size, which is seen as an error when it comes to passport sized pictures as they are meant for professional purposes. If he or she is wearing glasses, make sure they don't hide the eyes; if they do, change your angle slightly. It is hoped however, that you do not need to spell out to your subject that sunglasses are not allowed.
Step 3
Before you click the picture, make sure you are standing at least 4 to 6 feet away from your subject. Now, use the camera viewfinder and make sure you get the dimensions right — the picture is a midshot, which means that it should be taken from where the chest or breast ends to about two and a half centimeters above the hair. Again, before you click, make sure all disturbing shadows have been eliminated, especially those under the eyes.
Step 4
If you are using a tripod, fix the camera on it. Ask your subject to give a neutral expression, sit up straight and to look directly at the midpoint of the camera lens. Ask them to do all the blinking and throat clearing before you click. When the subject is ready, click the picture.
Step 5
The next step is to upload the picture or pictures to your computer if you're using a photo-editing program to crop and retouch the photo. Otherwise, print out two copies of the passport photo. These photos must be printed on photo paper on a photo printer. Many types of photo printers are available these days, which are manufactured by good companies. Photo print paper is available in exclusive photo stores.
Step 6
After the pictures are retouched and you are ready to print them, measure your passport photo to ensure it meets standard dimensions of passport sized pictures. Do this manually with a ruler if you printed out your photo already, or use a photo-editing program on your computer to crop it to exact dimensions needed; in fact, this way you should be able to save the photo to the correct size before printing. You could also use a free passport photo template so as to save the time in measuring or cropping. Such templates are available on www.epassportphoto.com and similar sites.
How to Cite


See also
More from iloveindia.com
- Home Remedies | Ayurveda | Vastu | Yoga | Feng Shui | Tattoos | Fitness | Garden | Nutrition | Parenting | Bikes | Cars | Baby Care | Indian Weddings | Festivals | Party ideas | Horoscope 2015 | Pets | Finance | Figures of Speech | Hotels in India : Delhi | Hyderabad | Chennai | Mumbai | Kolkata | Bangalore | Ahmedabad | Jaipur
- Contact Us Careers Disclaimer Privacy Policy Advertise With Us Lifestyle Sitemap Copyright iloveindia.com. All Rights Reserved.