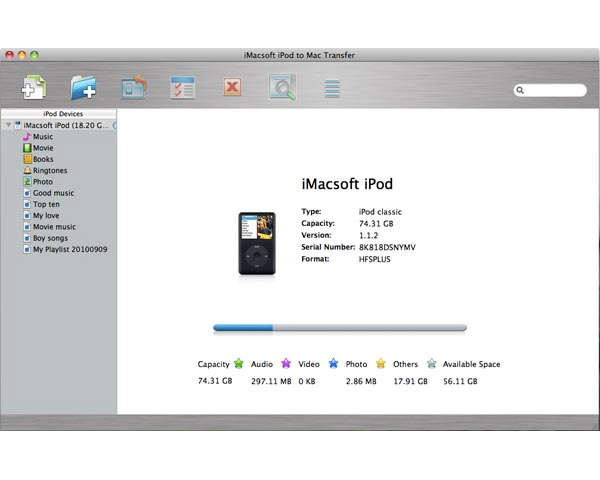
Transferring music from an iPod to Mac is not as easy as transferring music from Mac to iPod. Read below to learn how to transfer music from iPod to Mac.
How To Transfer Music From iPod To Mac
Since the time Steve Jobs launched the iPod, he brought about a complete revolution in the way we listen to music. Not only does the iPod enables one to carry one's entire playlist consisting of thousands of songs on the palm of the hand, but it also makes sure that people are indulged in music anywhere, anytime—a far cry from the bulky walkman that required carrying a bagful of audio tapes behind. In addition, the iPod is not only your music player, but also a storehouse of photos, videos and many other files. The iPod, nowadays, have become a necessity just like cell phone or wallet. Such a dedicated music player is necessary so that mobiles preserve the battery charge to do what they do best and that is to make calls. Listening to music and watching videos do consume a lot of charge. This the main reason as to why mobiles with sleek MP3 capabilities and the space to store thousands of songs have not managed to eat into the iPod’s share.

The source of music for the iPod comes from Mac or PC, from where you transfer the music. But imagine if the hard disk drive crashes or worse a thief takes a fancy to your Mac and finally manages to take it with him. In both cases, the music that you have collected through several years is lost. When you get a new computer, the only option you have for building your former music library is by transferring the songs from your iPod, as keeping the music collection at two places is always better. You will have a back-up if you lose one. But this is when you learn that though you can transfer the music from the Mac to the iPod the reverse is not possible, or at least you thought so. This is because Apple has disabled the feature, to protect the music copyright. The good news is that, though how much ever Steve Jobs may frown, you can transfer your entire music from your iPod to the Mac, and without having to spend a single dime. Read the article below to learn how you can do this.
Transferring Music From iPod To Mac
-
Before connecting the iPod to the Mac, you should disable the syncing. If you don’t do this, then there is risk of all the data in the iPod getting deleted. You can disable the syncing by pressing and holding the command and option keys, while plugging in the iPod. Hold the display keys until you see the iPod display in iTunes.
-
Now, confirm that the iPod is mounted in iTunes as well as on the Mac. Once the iPod is mounted on the Mac, you should double click the iPod icon on the desktop. There will be three folders listed but the music files will be hidden. The music folder can be made visible by using terminal, which is a command line interface.
-
First launch the terminal which is located at the /Applications/Utilities/. Then type – defaults write com. apple. finder AppleShowAllFiles TRUE – press the return key and type – killall Finder – press return key. This command will display all the hidden files.
-
To locate the media files, double click on the iPod icon and then click the name of the iPod in the Finder window’s sidebar. Open the iPod control folder and then the music folder.
-
You can copy the files in two ways. You can either drag and drop the files or copy them to an appropriate location on the Mac or you can copy them to a new folder. To copy the files, first create a folder in the desktop and rename it. Then drag the music files to the new folder. This will start the copying process. The transfer may take some time depending on the size of the files being transferred.
-
You can now add the music back to the iTunes. First click ‘Preferences’ from the iTunes menu and then select the ‘Advanced’ tab. Check the ‘Keep iTunes Music folder organized’ and another Check against ‘Copy files to iTunes Music folder when adding to Library’. Then click the ‘OK’ button.
-
To add to the library click ‘Add to Library’ in the iTunes File menu and then browse the folder that contains the iPod music that you transferred to the desktop. Then click ‘Open’. The files will be copied to the iTunes library.
See also
- Cameras | Computers | LG | Laptops | Mobile Phones | Motorola Mobiles | Nokia Mobiles | Samsung | Sony Ericsson | Televisions
More from iloveindia.com
- Home Remedies | Ayurveda | Vastu | Yoga | Feng Shui | Tattoos | Fitness | Garden | Nutrition | Parenting | Bikes | Cars | Baby Care | Indian Weddings | Festivals | Party ideas | Horoscope 2015 | Pets | Finance | Figures of Speech | Hotels in India : Delhi | Hyderabad | Chennai | Mumbai | Kolkata | Bangalore | Ahmedabad | Jaipur
- Contact Us Careers Disclaimer Privacy Policy Advertise With Us Lifestyle Sitemap Copyright iloveindia.com. All Rights Reserved.


