The perfect French manicure can be achieved by following some simple steps. Check out the tips given below and know how to do a perfect French manicure.
How To Do A Perfect French Manicure
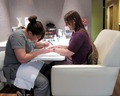
In the world of fashion and style, nothing is constant or static. Trends change and evolve, giving rise to new style statements and designs. However, the base of this evolution remains the same, with only mild variations and alterations. The influence of history and trends from yesteryears has always been seen throughout the ages. People have always tried to travel through time and relive the glorious days of the 70s, 80s and even the 40s. Whether it is the shoulder pads and plaid skirts of the 40s century or the kaftans and the cat-suits of the 70s, fashionastas and trend setters have always tried to recreate and bring them back to modern times. One such “never to go out of style” trend in the nail fashion circuit is the simple and elegant French manicures.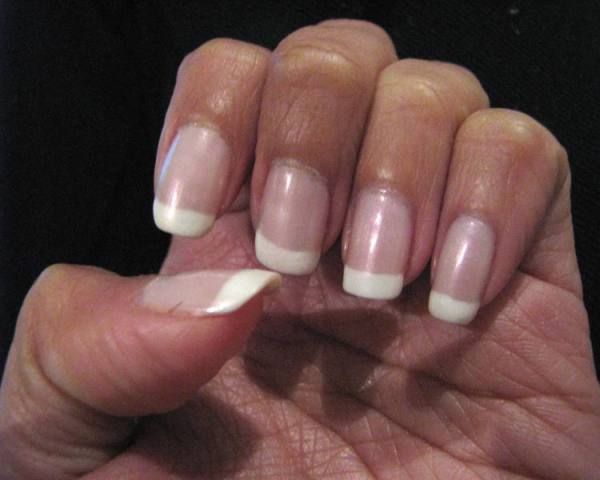
Image: jerine@flickr
French manicure is very popular with women (in some cases, even men) all over the world, partly because of its well-groomed appearance and partly due to the fact that it gives the impression of having long nails. This classy and chic look is said to have been invented during the 1930s in Paris, although there is no strong evidence to support this statement. Nevertheless, the style has become quite a rage with the women, worldwide and continues to rule over the modern world, in terms of popularity. However, to get the perfect French manicure look, it is vital to follow the steps properly particularly when you want to do it yourself. For your help, we have provided some tips on how to do a perfect French manicure.
How To Get The Perfect French Manicure
Shape & Style
The first and foremost step to give yourself a good French manicure is to clip and trim your nails to the desired length and shape. This will be the base for your manicure and should be done perfectly. Trim your nails as evenly as possible and make use of a nail filer to smoothen the edges in a single direction. This should be done to prevent the chapping and splitting of the nails.
Soften The Cuticles
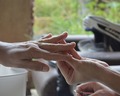
Groom and soften your cuticles by soaking them in a bowl of warm water for some time and then patting them dry, using a soft towel. Using a cuticle pusher or a cuticle stick (preferably a cotton padded one), gently push back your cuticles. Nip off any excess hangnails or cuticles that might be present afterwards. You can proceed by applying a cuticle massage cream to remove any traces and marks from the nails, before starting with the manicure procedure.
Base Coat
To protect and smoothen the nail surface and help in the longer restoration of the manicure, apply a layer of base coat or a nail treatment. If you are looking for a natural healthy color that resembles your own nail color, then you can go for a mild pink base coat for the entire nail area and allow the coat to dry completely.
Manicure Guide
Remove one of the manicure guide strips from the paper backing and place it firmly across the nail, to separate the tip from the rest of the nail. In case you have very short nails, then you can apply the guides a little lower on the nail beds. Ensure that you leave around ¼ inch of the guide hanging out on either sides.
The White Tip Color
Just above the nail guide apply a coat of the “natural white” nail color, starting from one side and gently stroking on a slant towards the center. Follow the same step from the opposite side and move towards the center. Once dry, carefully remove the strip of guide from the nail bed.
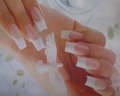
Nail Polish
The next step is the application of the nail color, which is usually done by applying two even, coats one over the other. The second coat is applied after the first coat dries off completely. Generally, neutral shades are used for this purpose, like pastel pink, soft beige and sheer polish. This step can be followed by the application of a top coat for extra shine and shimmer.
How to Cite


More from iloveindia.com
- Home Remedies | Ayurveda | Vastu | Yoga | Feng Shui | Tattoos | Fitness | Garden | Nutrition | Parenting | Bikes | Cars | Baby Care | Indian Weddings | Festivals | Party ideas | Horoscope 2015 | Pets | Finance | Figures of Speech | Hotels in India : Delhi | Hyderabad | Chennai | Mumbai | Kolkata | Bangalore | Ahmedabad | Jaipur
- Contact Us Careers Disclaimer Privacy Policy Advertise With Us Lifestyle Sitemap Copyright iloveindia.com. All Rights Reserved.