Designing your own clothes is a smart way of saving money. Learn how to design your own clothes here.
How To Design Your Own Clothes
Who does not love wearing good clothes? Who does not want to look smart and dashing? Don’t many of you save up to buy that awesome shirt or dress you saw on the mannequin while window shopping at a mall? Well, you do realize your wish when you walk back home with what you had in mind. However, you go back with a big hole in your pocket! Most labels come with exorbitant price tags. You know that very well, but has that never provoked you into thinking whether you have the option of designing your own clothes? Designing your own clothes is a smart way of saving money, earning a living and even stating your sense of style. There are, however, many aspects that you have to keep in mind when designing your own clothes. You will have to mull over the clothing's purpose, shape, quality, fabric, color and cost of materials. Even if you do have a plan in place, your principal challenge will likely be to figure out how to convert your design theories into stunning garments. Here is a step by step plan to help you get going. So, read on.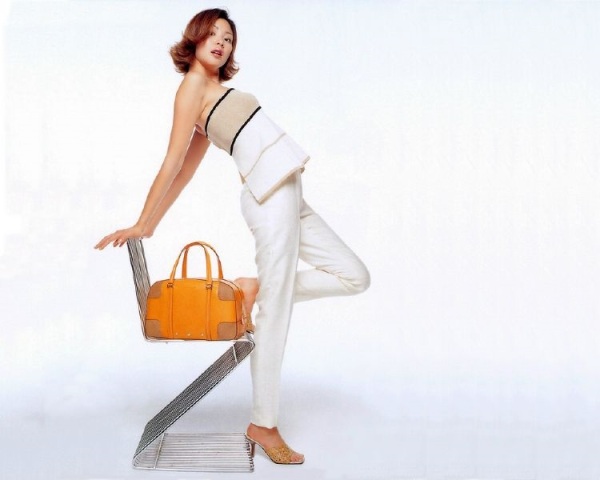
Image: jaky@flickr
Tips For Designing Your Own Clothes
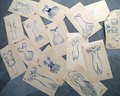
Sketching
- Make use of a pencil for opening drafts. In this way you have the option of fixing and refining your draft. Once you are done with the final draft, ink it in pen and in color.
- Next, draw a rough outline of the human form. If you are not at ease with your sketching skill, you could use a cut-out of the body. In this way you just have to worry about outlining your designs. Simply place tracing paper over the cut out, trace the body and then sketch your designs. You can either purchase or make your own cut outs.
- Choose what item of clothing you are going to draw (e.g., pant, skirt, shirt, etc.).
- Pencil out the garment the way the model would wear it in real life. Think about how the material would swathe and fall.
- Highlight your draft, brightening the lines. You can go a step ahead by giving him/her hair, shoes or even accessories. This is just to make sure he or she has a persona.
- Once you are done with the drafting, you can start filling in the color. To color in your sketch you just have to choose your favorite color pencils. Then sketch out the piece of clothing. Make sure to outline the seam lines. You can now color the garment and even use shading to give it intensity.
- If you have patterns in mind, do feel free to add them in.
Stitching
Whether you like it or not, in order to design clothes you have to learn how to stitch. Well if that is tough, attend sewing classes and make sure to learn how to stitch by hand and how to use a sewing machine. To get started make your own sewing kit. For this you would need stitching needles, an assortment of thread, measuring tape, sewing gauges, pins and pincushion, stitch remover, sharp bent-handle dressmaker shears, pinking shears, regular pair scissors and a bodkin. Make sure you stitch on a large, stable tabletop.
Whether you like it or not, in order to design clothes you have to learn how to stitch. Well if that is tough, attend sewing classes and make sure to learn how to stitch by hand and how to use a sewing machine. To get started make your own sewing kit. For this you would need stitching needles, an assortment of thread, measuring tape, sewing gauges, pins and pincushion, stitch remover, sharp bent-handle dressmaker shears, pinking shears, regular pair scissors and a bodkin. Make sure you stitch on a large, stable tabletop.
Pattern Making
A pattern is the cut-out of your plan that you will use to outline each piece item of clothing onto the material. To make a blueprint, you will need mold paper, daily newspaper etc. Here are a few examples of making your own patterns.
- Use your own clothing. As long as your clothing fits, this will give you the proper measurements without the measuring.
- Trace the garment onto the pattern material.
- Make sure to add a seam allowance
- Cut along the line to form your pattern.
- Be sure to use material with perfectly square corners for easier measuring.
- Using measuring tape measure yourself or the cut out you earlier made.
- Record the measurements.
- On your pattern paper, sketch a straight line down the center to the length of the garment. Now draw two vertical lines, the vertical line on the left edge and the horizontal line at the bottom rim of the paper.
- Draw the measurements onto your pattern paper using a straight edge.
- Cut along the line to form your outline.
- Remember that the pattern should already include the seam allowances.
Final Draping
Now that you are done with the basic pattern, you can proceed and drape your cut out with it. Here is how you should be going about it.
- Pin the pieces together.
- Lay out the pieces, lining up the edges that should be pinned together.
- Overlap the pieces a half-inch (the seam allowance) and pin the pieces together.
- You can also use a dress form. The dress form should match your body, or the body of your cut out, as closely as possible for the best finished product. Add filling where required.
- Stitch the garment.
- Add finishing, like buttons or zips.
- Add embellishments and accessories as per your requirement
Well, with this you are done! You can now step back and be in awe of your creation. And yes, don’t be scared to make any adjustments or try different permutations and combinations. Happy Designing!
How to Cite


See also
More from iloveindia.com
- Home Remedies | Ayurveda | Vastu | Yoga | Feng Shui | Tattoos | Fitness | Garden | Nutrition | Parenting | Bikes | Cars | Baby Care | Indian Weddings | Festivals | Party ideas | Horoscope 2015 | Pets | Finance | Figures of Speech | Hotels in India : Delhi | Hyderabad | Chennai | Mumbai | Kolkata | Bangalore | Ahmedabad | Jaipur
- Contact Us Careers Disclaimer Privacy Policy Advertise With Us Lifestyle Sitemap Copyright iloveindia.com. All Rights Reserved.