In case you want to get information on making a scarf at home, use the tips provided in the lines below. Explore this article and learn steps on how to knit a scarf.
How To Make A Scarf
Accessories can add style and grace to even the simplest of clothes. Just as a pair of simple jeans looks sexy, if you wear it with a nice, broad-buckled belt, even scarves can add oodles to your look. In fact, a colorful scarf can make the dullest of shirts or coats look awesome. At the same time, it can also protect you from the chilling breeze of winters as well as searing winds of summer. In short, a scarf serves dual purpose, that of making you look good and protecting you from extreme of weather. Another positive point of scarves is that they can be made easily at home, without spending too much money. Read on further and get some great tips on how to make a scarf.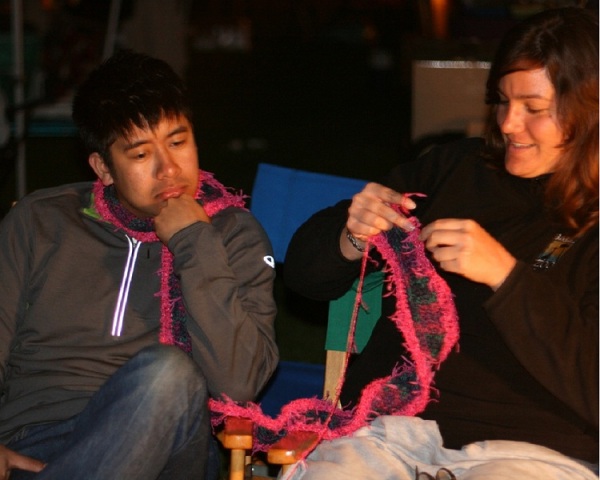
Image: DieselDemon@flickr
Making A Scarf
From Fabric
Items Needed
- Colorful Fabric
- Needle
- Thread
- Fabric Marking Pen
- Yardstick or Ruler
- Dressmaker Shears
Instructions
- First of all, you need to decide on the length and breadth of your scarf.
- While arriving on the resultant dimensions of fabric that you need to buy, make sure to keep a few centimeters extra, for hemming purposes.
- In case you want to add fringe to your scarf, make sure that the length of the fabric is 6 inches extra than what you desire for the scarf.
- Next, you need to go to the market and buy a piece of colorful felt, for the purpose of making a scarf.
- Bring back the fabric and using thread of the same color as the fabric, hem its sides.
- In case you do not want to add fringe, your scarf is ready.
- If you want to add fringe to the scarf, mark the fabric, at a distance of about 3 inches, on either sides.
- Using yardstick or ruler and fabric marking pen, draw a series of horizontal lines, ¼-inch apart, between the marked lines and the outer end of the fabric.
- With the help of dressmaker shears, cut along each of the horizontal lines.
- Hem the other two sides of the fabric.
- Your scarf is ready!
From Scraps
Items Needed
- 1 water-soluble Stabilizer, 18-inch x 60-inch piece
- Scraps of Ribbons and/or Fabrics
- Iron
- Fabric Scissors
- Sewing Machine
- Thread, in desired colors
- Bucket, containing water
Instructions
- First of all, lay the piece of stabilizer flat.
- Now, cut the pieces of ribbon, lace, or fabric into little pieces of various lengths.
- Place the scraps on one-half of the stabilizer, in a pleasing pattern. You can go for the random look by scattering the scraps or a neat look by arranging the pieces in order.
- The next step would be to fold the other half of the stabilizer over the first one. In the meantime, set you iron to dry, cotton setting and place the press cloth over and under the stabilizer. Press for about 20 seconds.
- Now, set the sewing machine for a straight stitch and start sewing all the way down the length of the scarf, from right to left. Make sure to backstitch at the start.
- When you reach the end, instead of ending the line, loop slightly and go back up to the top of the scarf, in a long line about ¼-inch away from the first line. For attaining this, lift the presser foot, but not the needle, turn the stabilizer slightly, bring the presser foot back down, and continue sewing.
- Continue the sewing process up and down the scarf, without ending the line.
- Repeat the process for the width of the scarf, going back and forth without lifting the needle. Make sure you sew the scarf twice, along its length and width, to ensure it is perfectly done.
- For your benefit, you can add another color of thread over the stitches, to give a contrasting look.
- When you have completed the sewing process, soak the scarf into a bucket containing water. This is mainly done to dissolve the stabilizer. Once soaked, hang the scarf out for drying.
- Your pretty scarf is ready to accentuate your dress!
How to Cite


See also
More from iloveindia.com
- Home Remedies | Ayurveda | Vastu | Yoga | Feng Shui | Tattoos | Fitness | Garden | Nutrition | Parenting | Bikes | Cars | Baby Care | Indian Weddings | Festivals | Party ideas | Horoscope 2015 | Pets | Finance | Figures of Speech | Hotels in India : Delhi | Hyderabad | Chennai | Mumbai | Kolkata | Bangalore | Ahmedabad | Jaipur
- Contact Us Careers Disclaimer Privacy Policy Advertise With Us Lifestyle Sitemap Copyright iloveindia.com. All Rights Reserved.